
I have to say that I find it funny that a few short months ago the thought of making homemade bread scared the heck out of me. It took an afternoon of cooking with Dani to propel me past this unreasonable fear of yeast when her and I made French Bread together. Since then I also tackled TWD's Pecan Honey Sticky Buns.
When I saw Brown Eyed Baker's recipe for Homemade Pita Bread, I was excited to make it...albeit that it took me a few months to actually get around to making it, but I finally did!
While the outcome of my pita bread was not complete perfection, it was far from a failure. I think I made the first mistake when I realized I needed just a take more water for the first step...I think I added a bit too much extra making my dough very sticky. This made is extremely hard to work with for the rest of the process because it just stuck to everything! It made it pretty difficult also to shape them into discs, as you can see they are far from perfect looking.
The rising process, however, seemed to be right on target for me as far as times. I made bigger pitas so I got 6 out of this recipe on purpose since I am using this as sandwich bread. The end result is that they tasted great but with one missing detail - they lacked a pocket! I am not sure if this is due to my water error, not giving the dough enough time to rise, using active dry yeast, or kneading the dough too much or maybe even too little (I used my stand mixer for 10 minutes). It could have happned anywhere in the process. The consistency of the pita bread is spot on to what I'd find at the bakery but just without a pocket. I did make these thick enough though that I can cut a pocket into it. Maybe that was even my problem, perhaps they were too thick!
Anyway, I do plan on making this again and hopefully getting a prettier and more of a pocket-y result! It was still fun to make, they still taste good, and the experience has not deterred me at all from making more breads, in fact it only motivates me more! So overall this was more than a worthwhile experience!
Pita Bread
(from BrownEyed Baker's Blog)
Makes 8 pitas
3 cups flour
1 1/2 teaspoons salt 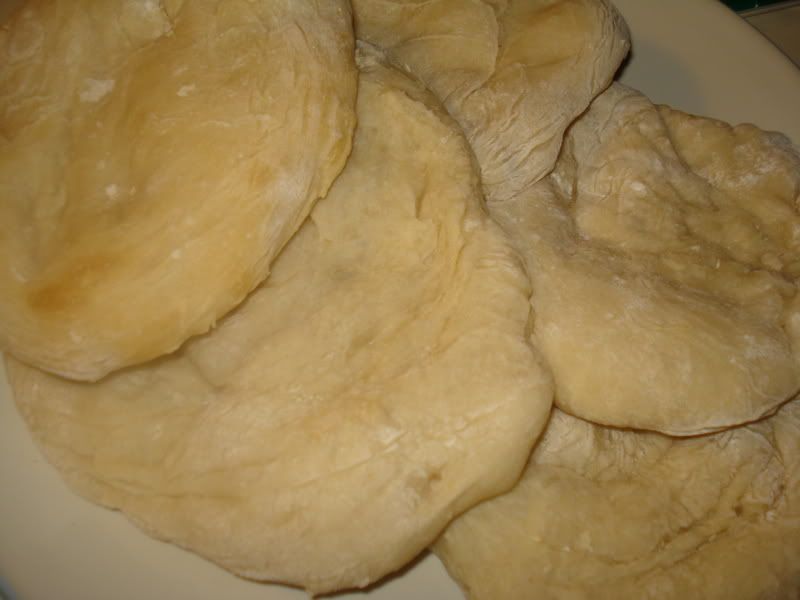
1 Tablespoon sugar or honey
1 packet yeast [I used active dry yeat]
1 1/4 to 1 1/2 cups water, roughly at room temperature
2 tablespoons olive oil, vegetable oil, butter, or shortening
Mix the yeast in with the flour, salt, and sugar. Add the olive oil and 1 1/4 cup water and stir together with a wooden spoon. All of the ingredients should form a ball. If some of the flour will not stick to the ball, add more water [I had to add a bit more water but probably a little too much so do so with caution!].
Once all of the ingredients form a ball, place the ball on a work surface, such as a cutting board, and knead the dough for approximately 10 minutes. If you are using an electric mixer, mix it at low speed for 10 minutes.
When you are done kneading the dough, place it in a bowl that has been lightly coated with oil. Form a ball out of the dough and place it into the bowl, rolling the ball of dough around in the bowl so that it has a light coat of oil on all sides. Cover the bowl with plastic wrap or a damp kitchen towel and set aside to rise until it has doubled in size, approximately 90 minutes.
When it has doubled in size, punch the dough down to release some of the trapped gases and divide it into 8 pieces (I broke mine into 6 pieces). Roll each piece into a ball, cover the balls with a damp kitchen towel, and let them rest for 20 minutes. This step allows the dough to relax so that it’ll be easier to shape.
While the dough is resting, preheat the oven to 450 degrees. If you have a baking stone, put it in the oven to preheat as well. If you do not have a baking stone, turn a cookie sheet upside down and place it on the middle rack of the oven while you are preheating the oven. This will be the surface on which you bake your pitas.
After the dough has relaxed for 20 minutes, spread a light coating of flour on a work surface and place one of the balls of dough there. Sprinkle a little bit of flour on top of the dough and use a rolling pin or your hands to stretch and flatten the dough. You should be able to roll it out to between 1/8 and 1/4 inch thick - 6 inches in diameter. If the dough does not stretch sufficiently you can cover it with the damp towel and let it rest 5 to 10 minutes before trying again.
Monday, August 4, 2008
Homemade Pita Bread
Subscribe to:
Post Comments (Atom)


4 comments:
I think I need to buy a baking stone before I tackle this recipe. Thanks for the confidence!
Yum! Those look so good! I wish I had one RIGHT NOW!!!
I seriously am going to get over my fear and make this. I'll probably have a chance to make this later this week. *crossing fingers!*
these look very good!
Post a Comment